

How Do You Choose Between an Autorefractor and an Auto Refractor-Keratometer?
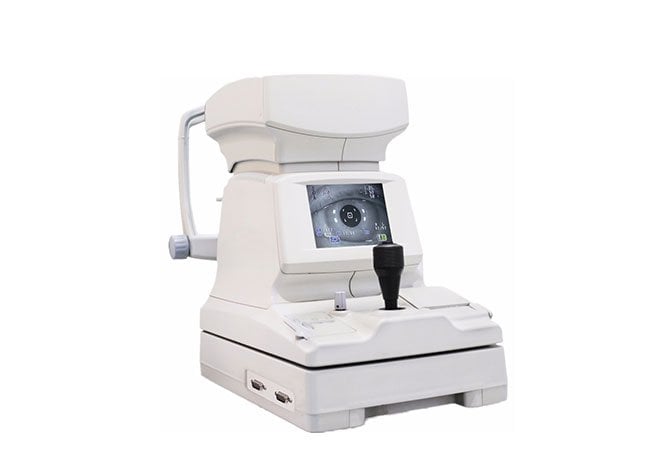
An extra measurement mode adds little value if nobody uses its output. We choose refraction equipment by the clinical workflow it must support.
Choose an autorefractor for the required objective refraction workflow, and consider an auto refractor-keratometer when documented corneal-measurement tasks justify the additional function. We compare the exact model, usable outputs, positioning, training, and support before deciding.
For distributors and clinic buyers, the next step is to turn those needs into a practical demonstration. We start with the measurement tasks, then follow the results through the examination and recordkeeping process.
What Different Tasks Do Autorefraction and Keratometry Support?
Map each instrument function to a real task and responsible operator.
In brief: autorefraction supports an objective starting point for refractive assessment, while keratometry measures selected corneal curvature data. A combined device is useful only when both outputs fit your documented workflow.
Separate the measurement jobs before comparing devices
Autorefraction estimates refractive error by analysing how light is reflected from the eye. It is commonly used as an objective starting point before clinician-led refinement. A basic autorefractor therefore answers a different operational question from keratometry: it helps estimate the lens power direction, while keratometry describes aspects of anterior corneal curvature. A combined auto refractor-keratometer brings those tasks into one examination station, but it does not turn objective readings into an automatic final prescription.
Keratometry can be relevant when a practice needs corneal curvature information for a defined reason, such as documenting corneal measurements or supporting a contact-lens assessment. The exact modes, measurement ranges, displays, and intended uses vary by model. Latam Optical’s general introduction describes autorefractors as measuring refractive information and combined units as also measuring corneal shape, while noting that the product capabilities belong to specific instruments rather than every autorefractor (source). Treat that page as background, not as proof of a specification for a Hongdee product.
Our procurement question is not “Which instrument is more advanced?” It is “Which outputs will staff use, record, and explain?” If the clinic only needs objective refraction as a starting point for subjective refraction, a keratometer function may add complexity without solving a current bottleneck. If corneal readings are already part of a contact-lens or diagnostic workflow, an integrated option may reduce equipment changes and duplicated patient positioning. We should still confirm whether the selected Hongdee model includes keratometry; do not assume that every product on the Hongdee auto refractometer page is a combined refractor-keratometer.
| Procurement question | Autorefractor focus | Auto refractor-keratometer focus |
|---|---|---|
| Primary output | Objective refractive estimate | Objective refractive estimate plus specified corneal measurements |
| Typical decision | Starting point for refraction workflow | Starting point plus a defined corneal-data task |
| Main verification | Refraction modes and repeatability | Refraction modes, keratometry modes, and output handling |
| Key risk | Treating an estimate as a prescription | Paying for unused functions or assuming universal modes |
Match outputs to records and referrals
Use a short measurement map before requesting quotations: list the exam type, measurement, operator, record destination, and follow-up decision. This makes a demonstration measurable and prevents a combined instrument from being marketed as a complete clinical solution.
Which Measurement and Positioning Features Should Buyers Compare?
Connect measurement modes with positioning, controls, data output, and room constraints.
Compare the complete measurement sequence—not isolated specifications—because alignment, chin-rest adjustment, eye selection, and data transfer can determine whether a feature is usable in practice.
Observe the full sequence, not just the result screen
Ask the supplier to demonstrate the exact sequence your staff will use: patient seating, forehead and chin support adjustment, alignment, eye selection, measurement capture, repeat measurement, and result review. Observe whether the operator receives clear feedback when alignment is incomplete and whether the device allows an intentional re-measurement rather than silently replacing a result. The words “automatic” and “tracking” should prompt a workflow question, not an assumption that every patient will be positioned correctly without supervision.
For the refractive function, compare measurement modes, sphere/cylinder/axis presentation, eye handling, fixation target, and result storage. For keratometry, request exact corneal outputs, units, axis conventions, capture conditions, and model-specific limitations. Do not import specifications from a similarly named model. Ask for the current manual and mark every item confirmed, optional, or unavailable. Keep it tied to the quoted configuration.
Also check how the operator recognises an incomplete capture. Test whether staff can pause, reposition, and repeat.
| Feature group | What to ask during comparison | Evidence to retain |
|---|---|---|
| Refraction | Which modes and outputs are included in this exact model? | Quotation and manual section |
| Keratometry | Which corneal measurements, units, and capture conditions are supported? | Model-specific specification |
| Positioning | How are alignment and patient movement indicated? | Live demonstration notes |
| Data workflow | Can results be printed, stored, or transferred as required? | Interface demonstration |
| Environment | What power, space, and lighting conditions are required? | Installation checklist |
Treat ergonomics as a repeatability issue
An uncomfortable or confusing setup can encourage operators to accept the first readable result. Ask two staff members to perform the same sequence and note whether they know when to repeat a reading. Have each operator explain the alignment signal, eye selection, and reason for repeating. Record differences in their steps, because an apparently simple control may still produce inconsistent handling between shifts. This review supports a practical usability decision without claiming an unsupported accuracy percentage. Also test whether the operator can see the patient’s posture and the instrument’s alignment cue at the same time. If a control is hidden, delayed, or easy to misread, include that limitation in the handover notes and training plan. The purpose is a repeatable process, not a more impressive specification list.
How Can a Clinic Evaluate a Demonstration Without Treating the Printout as a Final Prescription?
Test workflow reliability and decision boundaries, not one attractive printout.
Use repeatable, representative scenarios to judge operation and documentation, then require clinician-led subjective refinement; an objective reading is not a final prescription.
Build a representative demonstration protocol
Prepare a small set of permitted demonstration scenarios before the supplier arrives. Include straightforward refractive measurements, a case that tests cylinder and axis handling, and—only if relevant—a defined keratometry task. Use real clinic workflows and appropriate consent procedures rather than inventing patient stories. For each scenario, record patient positioning, fixation instructions, number of attempts, displayed warnings, result format, and whether the operator could explain the output.
Repeat selected measurements after repositioning the patient and after a short pause. The purpose is not to manufacture a pass/fail accuracy claim; it is to see whether the system behaves transparently and whether staff follow a consistent capture procedure. Compare the device’s outputs with the clinic’s established process only under the supervision and criteria chosen by the responsible clinician. A supplier should not present a single printout as proof that an instrument can replace subjective refraction.
This limitation is supported by clinical evidence on a different automated subjective-refraction system: a Journal of Optometry study tested 50 healthy adults and concluded that its proposed method was not yet accurate enough to replace clinical subjective refraction, recommending broader testing across ages, refractive errors, and ocular conditions (Otero, Aldaba and Pujol, 2019). That study is not evidence about every autorefractor, every auto refractor-keratometer, or any Hongdee model. It is a useful reminder to preserve the boundary between instrument output and clinical judgement.
| Demonstration item | Practical test | Procurement decision |
|---|---|---|
| Alignment | Observe feedback and repeat after repositioning | Is the process teachable and visible? |
| Refraction | Run representative eyes and review warnings | Are results handled consistently? |
| Keratometry | Test only the corneal task the clinic needs | Does the output serve a real record or decision? |
| Documentation | Save printouts, screenshots, and operator notes | Can staff explain what was measured? |
| Clinical boundary | Have the clinician complete normal refinement | Is the device positioned as an aid, not a prescriber? |
Record exceptions and handover questions
A good demonstration report includes failed captures, not only successful ones. Note what happened with blinking, poor fixation, movement, unusual posture, or an operator selecting the wrong eye. Ask how the instrument signals a questionable result and what the manual says staff should do next. If the device does not identify a condition, do not describe silence as confirmation that the measurement is valid.
Finish with a handover exercise: record the measurement, mode, eye, units, repeat status, and warnings.
What Training, Verification, and Service Support Should the Purchase Include?
Include a documented handover, model-specific verification, and a usable service route.
Require training on operation, limitations, cleaning, data handling, and escalation, plus a written acceptance record that distinguishes included support from optional service.
Define the handover package
Ask the supplier to include installation conditions, operator training, documentation, maintenance, cleaning guidance, warranty terms, and a service contact. Confirm attendees and follow-up support. Distributors should clarify regional coverage, spare-parts routing, and remote-support boundaries.
Training should cover the measurement sequence, patient positioning, fixation instructions, eye selection, repeat capture, warning interpretation, printing or transfer, and safe shutdown. It should also explain what the instrument does not measure. If keratometry is included, staff need model-specific instruction for the corneal measurement workflow and units. The supplier should demonstrate routine cleaning without asking operators to improvise around optical surfaces or moving parts.
Acceptance should be based on the quoted configuration. Check serial number, accessories, power compatibility, software version if applicable, physical condition, included manuals, and the agreed output functions. Run the clinic’s demonstration protocol again and retain signed notes. If acceptance depends on a third-party system or network, identify that dependency rather than marking the instrument fully accepted while integration remains untested.
| Handover area | Minimum evidence | Owner after delivery |
|---|---|---|
| Operation | Trained operators and signed procedure | Clinic supervisor |
| Measurement limits | Manual and limitation notes | Clinical lead |
| Cleaning | Written routine and approved materials | Assigned equipment user |
| Service | Contact, escalation path, warranty terms | Procurement or facilities lead |
| Acceptance | Configuration check and test record | Buyer and supplier |
Make verification a continuing routine
Verification is not only an installation event. Set a local schedule for checking visible alignment, patient supports, power and printing, result records, and any required reference checks defined by the manufacturer. Keep a service log that records date, operator, symptoms, action, and outcome. If readings seem inconsistent, staff should follow the manual and contact service rather than adjust hidden settings or continue presenting questionable values.
When requesting a quotation, send the task map and ask the supplier to respond line by line. You can also use Hongdee’s contact page to ask which current model and configuration match your measurement needs, what training is included, and how support is handled in your market. That conversation is more useful than asking for “the best” instrument without context.
Conclusion
Choose the instrument whose confirmed measurements, positioning workflow, demonstration results, training, and service plan match documented clinic tasks. Treat both objective refraction and keratometry outputs as professional aids—not automatic final prescriptions.